FREE IMAGE TOOLS · NO SIGN-IN
Make a GIF from your images.
Arrange two to eight still images, choose frame timing and looping, then preview and download a real animated GIF. Free, with no sign-in or image upload.
01Add your frames
or choose up to 8 from your device
Still JPG, PNG or WebP · 5 MB / 20 MP each
02Set the animation
Two to eight still images. The first frame sets the ratio. White padding, up to 640 px, no sound or video input.
Frame preview
LOCAL PREVIEWA little sequence, in motion.
Add two images to begin.
0 frames selected
Your images are processed in this browser.
Prepare your next image
Crop, resize or add text before building your document or animation.
Open image crop →Example: two product images into one looping GIF
This example uses an existing synthetic product image and its color edit from our Sunburst demonstration. GIF Maker only assembles those two still images; it does not generate the bottle or change its color. The original pictures are shown below so you can reproduce the sequence.
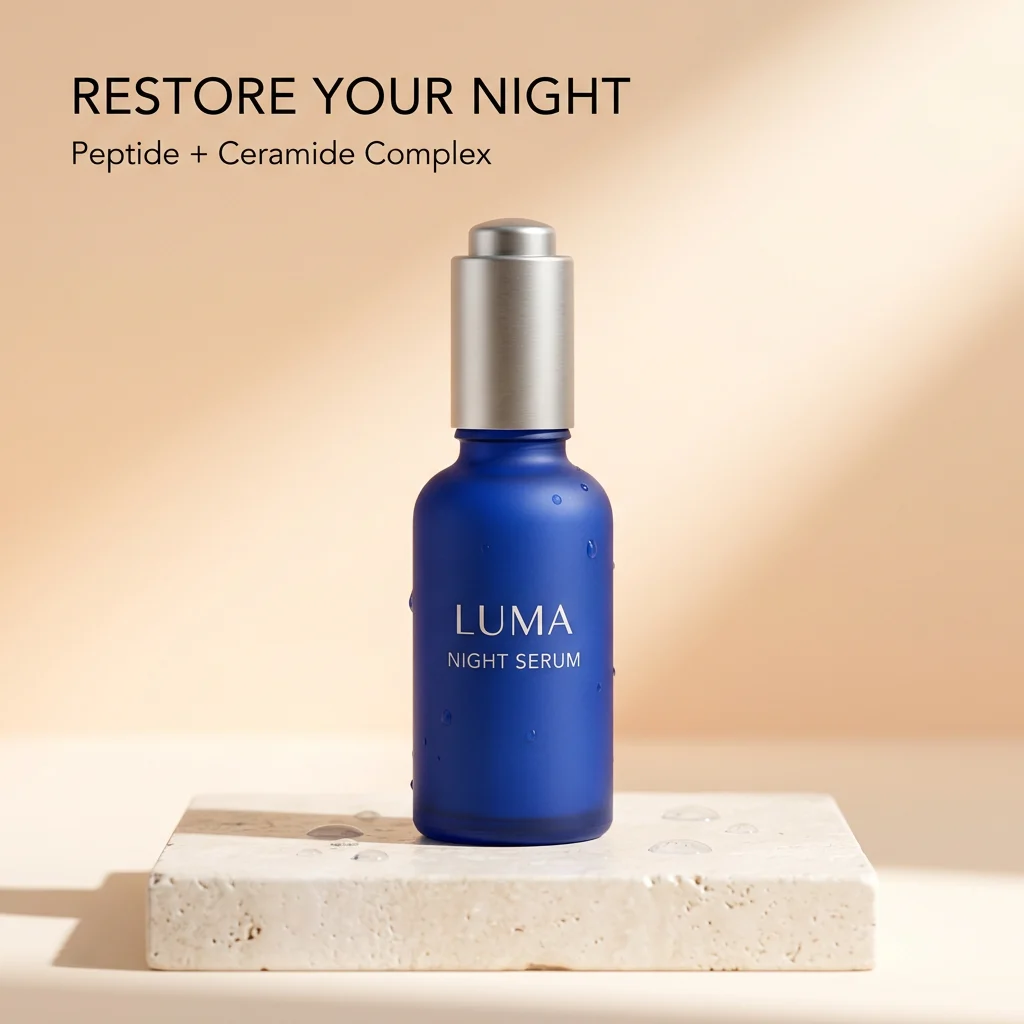
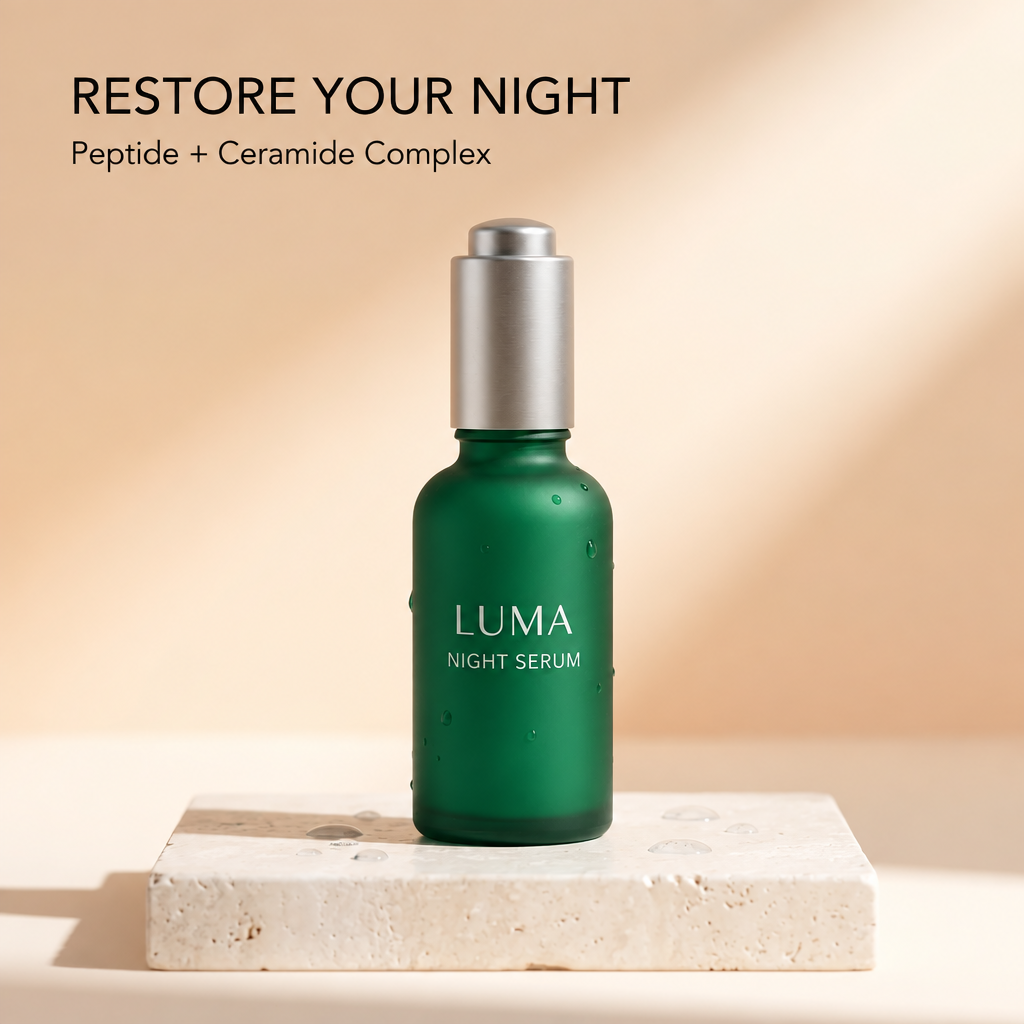
Upload blue first and green second. Select 480 px, keep the time per frame at 500 ms, and leave Loop continuously checked. Two frames at 500 ms make a one-second cycle. Select Create GIF, inspect the encoded preview, then download. The file linked below was exported through this tool with those settings on September 22, 2026.
Download the actual two-frame GIF →
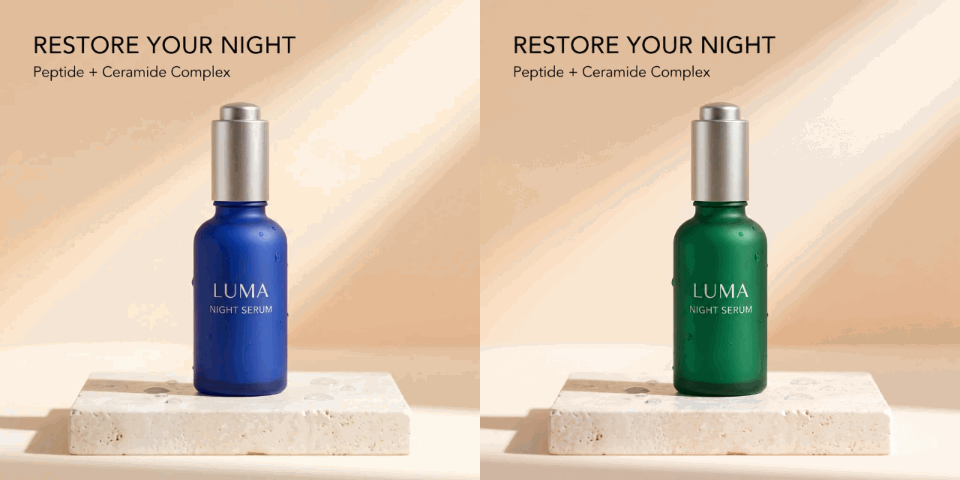
Expect a direct switch between pictures, not a smooth color transition. Check whether the cap, label and background move between frames: the source edit can change details, and GIF encoding cannot correct them. To make a slower comparison, change both frames to 1000 ms and rebuild for a two-second cycle. That changes timing, not the frame count. Use the still images to inspect fine detail; the GIF has a reduced color palette and is not an archive of the originals.
How to make an animated GIF
- Choose two to eight still JPG, PNG or WebP images. Arrange the numbered frames with the arrow controls.
- Choose the maximum edge size and time per frame. Enable continuous looping or disable it for one pass. Inspect individual frames before encoding.
- Select Create GIF. Play or pause the exported animation in the preview, then download it. Rebuild after changing frame order, timing or dimensions.
What kind of animation can I make here?
This GIF maker turns a short sequence of still pictures into an animated image. It works well for simple step-by-step illustrations, a small before-and-after sequence, changing captions or a few product views. Each selected picture becomes exactly one frame. The tool does not invent intermediate motion, blend between frames, animate a person from one photograph or generate new artwork. There is no video or audio input. If you need smooth camera movement or a talking subject, that is a separate video-generation task rather than something this image-sequence exporter provides.
How many frames and which input formats are supported?
Use between two and eight still JPG, PNG or WebP images. Each source may be up to 5 MB and 20 megapixels. Files are prepared at a maximum of 640 pixels on their longest edge to limit memory use during encoding. Animated GIF inputs, video files, SVG and HEIC are not supported. An image with the correct extension can still be unreadable if its contents are damaged; the tool reports that error rather than inserting a blank frame. Choose another valid image or export a compatible still copy from your own image editor.
How are frame dimensions and aspect ratio chosen?
The first image sets the aspect ratio for the entire animation. The size buttons specify a maximum longest edge of 320, 480 or 640 pixels. Small source images are not enlarged just to reach that maximum. Every later picture is fitted fully inside the same frame, with white padding where its ratio differs. Moving a different image into first position can therefore change the resulting shape. For a cleaner animation, crop your input images to a common ratio first, then resize and order them consistently before returning to GIF Maker.
How do frame time and looping work?
The time slider gives every frame the same delay, from 100 to 2000 milliseconds. At 500 milliseconds per frame, a four-image sequence lasts two seconds per pass. Increasing the delay creates a slower slideshow; decreasing it makes the sequence change faster. Continuous looping repeats the whole animation. Turning it off requests a single pass, although the application receiving the GIF controls its playback behavior. This tool does not offer separate timing for individual frames. The preview Play control restarts the exported animation, while Pause returns to a still frame for inspection.
Why do colors sometimes look different in a GIF?
GIF uses a limited color palette rather than the full color range of your source photograph. Each frame is reduced to at most 256 colors during export. Smooth gradients, shadows and subtle skin tones may show visible banding or color changes, especially in photos. This encoder does not apply dithering to hide those transitions. Transparent areas are deliberately placed on white, so the result is an opaque animation. For graphics with a few clear colors the difference may be small; for a detailed photo sequence, inspect the real encoded GIF instead of relying only on the still-image preview.
How do I choose a reasonable file size?
Start at 320 or 480 pixels if the animation is intended for a small on-screen display. Fewer frames and smaller dimensions generally reduce the work and the amount of image data, but there is no promised final size or compression percentage. Increasing the time per frame changes playback duration, not the number of frames, so it is not an effective way to make the same sequence much smaller. The result area displays the actual encoded file size. Check that size against the limit of the email, website or messaging application where you intend to use it.
What should I check before downloading or sharing?
Play the exported GIF and check its order, timing, padding and colors. Pause it to inspect a frame when the changes are difficult to follow. For a before-and-after sequence, confirm that the two pictures show the intended comparison and that labels remain readable at the output size. Avoid rapid high-contrast flashing in material you plan to share. Downloading provides the encoded animation, not a project containing your original editable layers. Keep the source images and note the chosen settings if you expect to make revisions after closing this tab.
Is processing private, and what happens if it fails?
The selected images are processed locally without an account or image-generation credits. The encoder is loaded when needed; your pictures are not sent to a GIF conversion server by this tool. A short progress message identifies the frame being encoded. On a device with limited memory, try fewer frames or the smaller edge setting and keep the tab open until the result is ready. Changing input or settings clears the previous export to avoid a stale download. Refreshing the page discards the working sequence, so save the final file before leaving.